What's new

Tutorial collection thread

A short one.
If you are using Amp sims for electric guitars or bass. Make sure to experiment with the input gain section of your amp sim (not to be mistaken with the gain on your amp). If you are using passive pickups that normally have a lower output turn it down. If you are using hot active pickups turn it a bit higher. This move gives you a better/more realistic response of the amp.

Sampe rate is also important. If your plugin doesnt come with an upsampling function (like unfortunatley Bias FX) increase your project sample rate.

Another one is to experiment with Cab IRs. A lot of people claim that the IRs that come with big programs like BIAS FX etc are not too good. I started to experiment with 3d party IRs bypassing Bias Fx convolver and using the free Gods Cab ones. Quite happy with the result.
 
Last edited:
A short one.
If you are using Amp sims for electric guitars or bass. Make sure to experiment with the input gain section of your amp sim (not to be mistaken with the gain on your amp). If you are using passive pickups that normally have a lower output turn it down. If you are using hot active pickups turn it a bit higher. This move gives you a better/more realistic response of the amp.

Sampe rate is also important. If your plugin doesnt come with an upsampling function (like unfortunatley Bias FX) increase your project sample rate.

Another one is to experiment with Cab IRs. A lot of people claim that the IRs that come with big programs like BIAS FX etc are not too good. I started to experiment with 3d party IRs bypassing Bias Fx convolver and using the free Gods Cab ones. Quite happy with the result.

Thanks for the tip! I'm going to try this out. is it pretty easy to disable the cab in Bias?
 
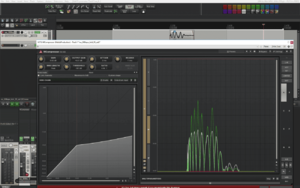
If you cant get comfortable with compression but know the theory (like me) try the free MComp by Melda. It has deep control and offers lots of graphic visualization. Especially the Waveform before and after feature is really great to SEE what your settings do, because at least for me its hard to tell how much a 10ms lets through from a wave and this really helps to get a feeling for what the time constants mean.
upload_2018-6-29_16-53-25.png
 
Dear friends, if you dont already know Michael White, he is my greatest discovery in the net when it comes to mixing/music production education.
In my opinion his lessons are by far the most well-structured, clear and straight to the point presentation of the art of mixing.

You can find his free YouTube lessons here:
 
Also for anyone who is serious about improving their mixing and mastering skills or music production skills in general, take a closer look at Seed to Stage's YouTube Channel, like "You Suck At Producing" he's one-of-a-kind, enjoyable voice and the perfect pace even for advanced beginners. I'm currently saving money to grab one of his online courses, which I usually don't, but I feel like this guy has some direct wire to my brain and makes me understand stuff that I couldn't get my head around for ages, especially sound design with Ableton stock plugins.

He also gives many of his Ableton racks away for free.


Here are some links to my two favourite StS playlists:
Mixing Tutorials
Tips and Tricks
 
All killer, no filler-- the most concise and actionable information I've gotten lately has come from the Sage Audio Youtube channel:

For example:

Those are some really interesting tips. Going to try the one where you print the remaining transient track after phase inverting one of the tracks after adding a transient designer. I'm guessing you could just do a submix going to a group track without actually printing it and accomplish the same thing (in cubase). Maybe printing is easier.
 
Those are some really interesting tips. Going to try the one where you print the remaining transient track after phase inverting one of the tracks after adding a transient designer. I'm guessing you could just do a submix going to a group track without actually printing it and accomplish the same thing (in cubase). Maybe printing is easier.
Sage is big on sending things to faders vs. say, using a wet/ dry knob on an insert which seems like such a minor workflow thing but is actually kind of major.
 
Sage is big on sending things to faders vs. say, using a wet/ dry knob on an insert which seems like such a minor workflow thing but is actually kind of major.
takes longer to set up, but then I think you get more flexibility....at least in the posted example. After you print out transient boost only, you can then put FX on just that to taste....
Then again, I love FX mix knobs. Gone are the days when I actually had to print a separate track in Protools just to do some parallel compression. So easy now.
 
Top Bottom